Friday 2 December 2016

Klymit Static V2 Inflatable Sleeping Pad

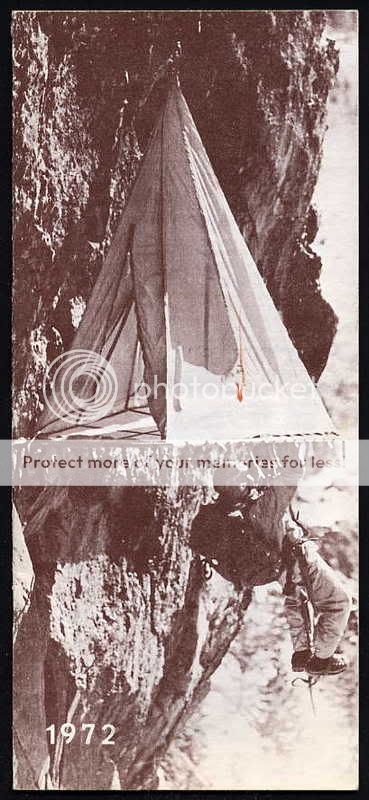
The Klymit Static V2 in use 900m off the deck whilst new routing in Patagonia

A pretty meagre bivvy on a tiny patch of grass
A good night's sleep  is as beneficial to a successful ascent as any piece of kit. With this in mind, we always think about having a warm enough sleeping bag or good waterproof tent, but the surface we sleep on is often overlooked.

In fact, a decent pad is key to getting a decent rest and keeping warm through the night. A poor sleeping bag can be easily made up for with layers of clothing, but nothing really works that well underneath you. The weight of your body will compress most insulating layers so that they no longer trap the air pockets needed to stop you losing precious body heat through the night.

On a big wall, these effects are amplified, since you will generally either be sleeping on bare rock, or snow which will both leech large amounts of body heat. In the case that you are on a Portaledge or hammock, you have moving air underneath you which can be even worse.

I took the cut down foam pad that night -
no surprise I was the first one up to take this picture!
Traditionally, climbers have used simple foam pads for big wall bivvies. There is good reason for this, since they are maintenence free and can be cut to size, but they do have some distinct disadvantages too.

Firstly, they are very bulky when packed. This is usually got round by doubling them up as haulbag liners, but when you do this it often means they are either too annoying to get out, or get forgotten to put back in in the morning so your haulbag has no liner and gets damaged.

Secondly, they are just not that great as insulators. Fine in a sheltered camping spot with a good sleeping bag, but up on the wall exposed to the elements and using the smallest sleeping bag you could find to save weight and space, it becomes more of a problem.

The second problem can be addressed by using a closed-cell self-inflating type camping mat, but these are both heavy and bulky so become impractical for all but out-of-the-car camping.

When I saw the new style of camping mats coming on to the market that could address both issues, I was interested to see whether they would become a viable alternative on the wall.

The light weight air bed style mats have now been around for a little while, offering a bit of choice of design, and I have tried a few from Klymit, Therm-a-rest and Alpkit.

The Klymit Static V2 - officially Portaledge friendly!
On reflection, I believe the Klymit Static V2 to be my favourite for a number of reasons, and I can vouch for it as both fully big wall tested and also slept on for the best part of three months.

On first impressions, the Static V2 is a very different design to that of the competition. What they have done is to inflate alternate cells instead of every one, meaning that you have small gaps inbetween. This designs allows a few important things. Firstly it just enables you to blow it up a lot quicker as it needs a lot less air. Secondly, it means they could make it really quite thick so it is more comfortable, and third it allows it to bend to contours more, meaning it fits better into hammocks and saggy portaledge beds.

They have also been quite clever with the sizing of the cells. The outer cells down the sides and at the head end are slightly larger, meaning you are less likely to roll off in the night, and can even get away without a pillow if needed.

On closer inspection, Klymit have used a burlier fabric than that of the other ones I have seen. While this may add a couple of grams, it is reassuring to know it will last longer. It also means it doesn't have the annoying crinkly plastic bag noise that I found with the Thermarest NeoAir.

The included repair kit tucks away in in its own neat little
pocket and includes a generous size patch for top and bottom
and plenty of high quality glue 
On the inevitable subject of punctures, yes we did have one in the group. It was not in the underside fabric, despite using it on gravelly surfaces quite often, but in the top where a heavy rock had been used to hold it down while deflated on a windy day. This was in fact very easily dealt with using a little patience to find the hole and the excellent repair kit included. The repair kit consists of a piece of top and a piece of bottom fabric and some glue (though in fact all we used was a spot of glue and it has been fine ever since). It is kept in a pouch that is sewn into the stuff sack, which I thought was a really nice touch as those little zip lock bags that are usually included always end up getting lost.

A side note on the repair kit - we actually got a lot more use out of it when the sole came away from my approach shoe. The glue they included was just enough to keep my shoe intact for a load more aid climbing and the hike out, so it really did save the day!


Our first night out on the new portaledge -
comfy and warm all night

Using the mat on the portaledge was great. It was so quick to get out and pack away that it was never a chore, and I was easily able to fix a small cord to the valve so that it could be clipped to the ledge while inflated. It fit exactly into the space on my ledge, which is a fairly compact one (RunOut Customs UL Double) so it should be fine on any other. I was using a very light sleeping bag for two weeks of portaledge sleeping and only got cold on the one night I didn't use the mat.


Tucked in nicely in a small size hammock
In a hammock it worked well too, folding into the contours nicely and insulating incredibly well.


Using these mats added a few grams of extra weight compared to standard foam mats, but actually saved us a lot of space in the haul bag. It also meant we were able to leave a cut-to-size foam mat in the haulbag to protect it, and therefore knew we had an emergency spare if one was dropped (always a possibility!)

While on expedition in Patagonia, me and the rest of the team spent somewhere around 75 nights each sleeping on the Static V2 mats either in camp or on the wall. We all loved them, and have been recommending them to everyone we know since.
The stunning Cochamó valley from the comfort of the ledge

The same ledge seen from above


There are two very small complaints I had with it, though these are both common to all mats in its class. One is that the bottom is a little slippy, I would like to see a something to just add a little friction underneath. The other is that although a cord around the valve works for a keeper string, I would prefer to see a dedicated clip in point. These are both trivial complaints though, in everything important this mat is excellent.

A great mat, well worth the money and significantly better than the competition. Highly recommended!


5 out 5 Pitons

Tech Specs from Klymit

Price     $64.95
Weight     16.33 oz / 463 g
Dimensions 72" x 23" x 2.5" / 183 cm x 59 cm x 6.5 cm
R-Value     1.3
Inflation     10-15 Breaths
Pack Size     3" x 8" / 7.62 cm x 20.3 cm
Fabric     30D Polyester Top, 75D Polyester Bottom
Warranty     Limited Lifetime

Scopes and Binos - Eyeskey 80mm spotting scope and Celestron Skymaster 70mm Binoculars

Planning our vertical adventure.....

One of the things that really excites me about new routing is picking out the line. Standing at the bottom trying to imagine all the moves, figuring out which features to follow.

Of course, on single pitch routes, this can mostly be done with the naked eye, but on a multipitch or a big wall there is a real limit to how much useful information you can get without a lens. Added to that is the difficulty of discussing the finer points with your teammates. Again on smaller routes a laser pen or even a pointing finger and good description can be enough, but sometimes it it really helpful to be able to focus on something and then show that exact view to your buddies.

Trying to find useful information on how much magnification you need to plan a big ascent is really pretty difficult though, so I thought I would share my findings on my last expedition.

Celestron Optical tubes -
amazing but not practical for expedtions
Obviously, I wanted to get the biggest lens I could afford. But what was also important was that it would not be too fragile or cumbersome, which ruled out most of the home astronomy style options such as the Celestron Optical Tube which offers amazing planetary views but has no dust seal and would have needed to be carried near enough as a single load. I also wanted to have the option of 'digiscoping' - using an ordinary camera attached to the scope. I was hoping this would help to draw up a rough topo from the comfort of base camp.

Eyeskey 80mm Spotting Scope
In the end I settled on two options. The Eyeskey 20-60 x 80 Zoom Spotting Scope  and a pair of Celestron Skymaster 20 x 70 Binoculars. Both are rubberised, waterproof and pretty tough so can take being shoved into a pack, and they were the largest lenses I could find like that.

While both can be tripod mounted, the scope really has to be and we only took one tripod, so the binoculars got used handheld most of the time. The scope came with a kit to adapt to a DSLR, but we did not end up taking one so I used the included mobile phone adapter and it was still fine for what we needed.


Celestron Skymaster Binoculars
I bit of maths - we were about 1km from the wall for the main figuring-out and the wall was somewhere between 1 and 1.2km high. Add maybe 500m to this for the altitude gain between the river and the wall. This works out that when viewing a pitch near the top of the wall we were around 1.8 - 2km from the rock. At this distance, with the scope we could see a 50m pitch full frame, with the binoculars it was closer to two pitches.

Viewing the wall from the river


Viewing Cerro Capicua's 1200m east face
3 pitches from the top, roughly 50m of rock shown.
Picture taken from position above with a phone on the included mount,
eye piece view was about 10-20% larger without the phone mount

For comparison, viewing the top pitches on El Capitan from El Cap meadow would be a distance of around 1300m, so the results would be something like 1.3 times better. Of course this is all approximate!

On granite, because the features are so prominent, this amount of magnification was definitely enough and gave us plenty of information to work with. To be honest, if it was much more I don't think we would have been able to get the image steady enough to view without a much heavier tripod (we had a manfrotto compact).

Up on the wall, the binoculars proved more useful, as aiming the scope at a steep enough angle was near impossible and the magnification was almost too much.

Checking our route with the binoculars from the first big ledge
In terms of the functionality, I really can't fault either of them. Both delivered well in terms of seeing what we needed to see and survived being hiked in and hauled admirably. A small gripe with the binoculars was that the rubber lens caps had no way to secure them, so would have been very easy to lose. We made a bodge with some tape and string but it was far from ideal. A built in flap like the one on the Eyeskey would have worked much better for our needs I think.

Overall, two great pieces of kit which will both be accompanying me on many more adventures. The increased vision they provided gave us much more confidence with our project, allowed us to discuss each pitch more easily from the ground and helped us chart our progress up on the wall.


Eyeskey 20-60x80mm Zoom Spotting Scope 
5 out of 5 - excellent quality, built to last and cheaper than most.


Celestron Skymaster 20x70mm Binoculars
4 out of 5 - great image and build but lost marks due to poor design on the lens caps


RunOut Customs UL Double Portaledge


The RunOut Customs UL Double providing a welcome sanctuary high on the wall

If there is one piece of gear that will always fascinate both climbers and non-climbers alike, it has to be the Portaledge. The idea of spending the night in a tent hanging from the rock brings about an idyllic notion of grand adventure on walls too big to comprehend.


Of course, their design was born from necessity, with early big wall ascentionists tiring of the hammocks and heavy steel cots they had been making do with. Though a few ideas came and went, it was Greg Lowe of Lowe Alpine's LURP (limited use of reasonable placements) created in 1972 that created the shape and style we are familiar with today.

This is of course a very niche market, with really quite a small number of people actually wanting to take on the routes that require such equipment. As a result, after the initial surge in re-design there has been very little in the way of improvement since the ever popular A5 portaledge was released in 1986.

In 2010, a new company arrived on the scene. Headed up by engineer and climber Luke Malatesta, RunOut Customs took the beloved old design of the A5 portaledge and reworked it to produce the RunOut UL Portaledge.

As with so many things in the outdoor world, there is always a trade off of comfort against weight. With the RunOut UL, the emphasis is definitely on reducing the weight and it comes in at 4.14 kg, less than half the weight of the popular Black Diamond Double Cliff Cabana.

Part of this saving does come from the footprint space being slightly smaller, and I was worried how it would be to sleep on, but after three weeks of solo and shared nights spent on it, I can vouch for it being big enough to do the job. I am 182cm tall (6 ft) and it was fine for me. Also having three guys sitting on it eating dinner was no problem.


The most amazing thing about this ledge, besides how incredibly light it is, is how quickly it can be set up. There is no spreader bar and nothing especially complicated, plus there is the ingenious feature that the straps are attached with maillons so if you do get in a tangle it is quick and easy to sort out. With a bit of practice, you can have it out of the bag and set up in less than five minutes, though of course the fine tuning to get it level can take a long time with any ledge when you're tired....

Once in the ledge, you won't find the luxury cup holders and excessive clip points that some other brands go for, just three simple daisy loops above the feet of each person (so no gear hanging in your face at night) and one at the top. Obviously it is easy to add to this if you need to, but unless you really are spending more than a week inside your ledge with the fly down and cannot hang stuff outside you will not need any more.


Making the best of a rainy day....
I went for the standard Simple UL fly on mine, and then covered the bag with duct tape (we had to do a lot of slabby hauls) and it definitely toughed it out well. Setting it up really nicely does require making sure the ledge straps are pretty much fully extended, but that's normal for portaledge flys. It doesn't have a window, which I guess could be an issue if you are trapped in it for a long time, but they often leak anyway. In terms of keeping the wind and rain outside, it was excellent. The one complaint I would have is the lack of a vent. As anyone with a single-skin tent will tell you, condensation can make you wetter than the rain outside if it can't escape. Managing this was a bit of an issue, my solution was to open it up whenever possible and keep a small microfibre towel hanging up and just give it a wipe every now and then, which worked OK. Having never actually been stuck in a rainstorm in any other ledge, I can't say how much better any other fly would have coped, but I have seen some that have a venting top.

One great feature of the straps that differs from other brands is that he replaced the usual metal grab locks with plastic for the middle straps. In really windy situations, the middle strap locks on other brands have been known to tear through the fly by continually batting against it. This solves the problem perfectly and doesn't seem to make any comprimise since they are still plenty strong enough and really easy to adjust.

The build quality throughout is exceptional, with all the attention to detail that you would expect from a carefully hand-made and individually inspected product. Every seam is beautifully sewn and all the metalwork finished really nicely. There are a whole bunch of custom options you can get from them too, such as carbon fibre or titanium poles, different colour fabrics and a three-section version that packs down even shorter. I went for the extra-burly haulbag for mine and it served me well.

Get your stuff stowed outside the ledge!
Overall, the RunOut UL Double is without a doubt the best portaledge I have tried. Light to haul, quick to set up and built to last. I guess if I was planning to spend weeks sitting out storms in one spot I might favour a slightly larger one, but for just getting on with the route with enough space to do all the essentials, the RunOut UL is the one for me!

Luke Malatesta at RunOut was great to deal with, and answered all the questions I had really well. It seems like a good independent company taking great care over their products, and that seems worth supporting to me.


RunOut UL Double Portaledge
5 out of 5 - Highly recommended!


RunOut UL Simple Fly

4 out of 5 - Great construction, tough and weatherproof, but could use a vent.


Here are the official specs:
- 1.125 OD 6061-T6 aircraft aluminum frame
- Precision CNC Machined 6061-T6 anodized corners
- Coated 420d Packcloth Bed (Ripstop when available)
- Double-butted hand polished connectors
- Large central fin eliminates shoulder cramping
- Sharp taper central seam allows more shoulder room
- High grade quick links on corners ensure a tangle-free set up
- Two opposed daisy chains on suspension keeps things organized 
- Double grommets sewn into bed allow quick water drainage
- High quality metal cambuckles make suspension adjustment a breeze
- Heavy wall side scuff for abrasion resistance
- 1680d nylon end scuffs protect ledge from damage if set up in corners
- 6-point bed tension system allows for a drum tight bed and prevents sagging
- Breaks down to 41" or 104cm for hauling
- Weighs  approx 9.12 lbs or 4.14 kg
- Very quick and easy to set up
- MADE IN THE USA


Wednesday 23 November 2016

Welcome to Big Wall Gear Reviews!


This blog is written as an independent source of reviews for equipment in some way related to climbing or the outdoors.

Most of what I review on here has been tested by myself in a big wall or multipitch environment, or just through a lot of use outdoors.

I have recieved certain items for free or on discount (I'm not rich enought to turn these offers down!), but I will not recommend anything I don't believe is good at what it does, and will always try to give a fair an honest opinion regardless of whether I paid for it.

I started this blog because I was frustrated at not being able to find the kinds of reviews I wanted when buying a lot of this kit, and I hope it can help some people out there doing expedition adventures or just needing good reliable kit to use outdoors.

If you have any questions about any of the reviews, please feel free to contact me.

Tom Ireson